将上一个例子的返回:
return [response_body]
改为:
return response_body
再次运行会发现速度变慢了。这是因此服务器对发送过来的字符串是按单个字节进行迭代的,所以最好对返回的字符串用一个可迭代对象包装一下。
如果返回的这个可迭代对象生成多个字符串,那么正文的长度即为这些字符串长度的总和。
接下来看一个例子:
1 | #! /usr/bin/env python |
将上一个例子的返回:
return [response_body]
改为:
return response_body
再次运行会发现速度变慢了。这是因此服务器对发送过来的字符串是按单个字节进行迭代的,所以最好对返回的字符串用一个可迭代对象包装一下。
如果返回的这个可迭代对象生成多个字符串,那么正文的长度即为这些字符串长度的总和。
接下来看一个例子:
1 | #! /usr/bin/env python |
环境变量字典包含了类似于CGI的变量,它是在每次请求时被服务器填充。
1 | #! /usr/bin/env python |
执行该脚本,然后在浏览器中打开http://localhost:8051/ 查看效果。
这个例子是将环境变量字典的值全部输出。
WSGI(Web Server Gateway Interface)并不是一个服务器,而是一个协议。最开始是用Python写的,现在很多语言都有了对应的实现。详细内容可以看这里: http://www.python.org/dev/peps/pep-3333/
WSGI应用程序接口是一个可调用的对象。它必须接收两个固定的参数:一个包含了类似CGI变量的字典;一个可调用的函数用于返回HTTP状态代码和数据头。
1 | # This is our application object. It could have any name, |
以上是一个应用程序的基本框架。由于没有服务器,因此这段代码目前还不能运行。
Session是位于服务器端的Cookie。它保存在服务器上的文件或者数据库中。每条session是由session id(SID)进行标识。
Cookie可以长久胡保存SID,直到Cookie过期。用这种方式更快更安全。但是得客户端的浏览器支持Cookie才行。
1 | #!/usr/bin/env python |
我们对服务器的时间进行哈希生成一个唯一的Session ID。
%s
SID = %s
这是将sid直接在url中传递。
%s
SID = %s
这是将sid放在表单中作为隐藏字段提交。
光有session id是不够的,还需要将内容保存到文件或者数据库中。这里可以使用shelve模块保存到文件。
session = shelve.open('/tmp/.session/sess_' + sid, writeback=True)
它打开文件并返回一个类似于字典的对象。
session['lastvisit'] = repr(time.time())
设置session的值。
lastvisit = session.get('lastvisit')
读取刚刚设置的值。
session.close()
最后操作完成之后要记得关闭文件。
接下来用一个例子展示下Cookie和Shelve共同使用。
#!/usr/bin/env python
import sha, time, Cookie, os, shelve

cookie = Cookie.SimpleCookie()
string_cookie = os.environ.get('HTTP_COOKIE')

if not string_cookie:
   sid = sha.new(repr(time.time())).hexdigest()
   cookie['sid'] = sid
   message = 'New session'
else:
   cookie.load(string_cookie)
   sid = cookie['sid'].value
cookie['sid']['expires'] = 12 * 30 * 24 * 60 * 60

# The shelve module will persist the session data
# and expose it as a dictionary
session_dir = os.environ['DOCUMENT_ROOT'] + '/tmp/.session'
session = shelve.open(session_dir + '/sess_' + sid, writeback=True)

# Retrieve last visit time from the session
lastvisit = session.get('lastvisit')
if lastvisit:
   message = 'Welcome back. Your last visit was at ' + \
      time.asctime(time.gmtime(float(lastvisit)))
# Save the current time in the session
session['lastvisit'] = repr(time.time())

print """\
%s
Content-Type: text/html\n
<html><body>
<p>%s</p>
<p>SID = %s</p>
</body></html>
""" % (cookie, message, sid)
有两个与cookie相关的操作,设置cookie和读取cookie。
以下例子展示了cookie的设置。
1 | #!/usr/bin/env python |
这是在数据头中使用Set-Cookie进行的操作。
浏览器返回来的cookie存放于os.environ字典中,对应的字段名为’HTTP_COOKIE’。以下是一个例子:
1 | #!/usr/bin/env python |
使用SimpleCookie对象的load()方法对字符串进行解析。
可以使用subprocess.Popen或者os.popen4让cgi执行shell命令。
1 | #!/usr/bin/python |
注意:这只是一个例子,在生产环境中这么使用是非常的不安全。
可以使用Cookies和Session对用户进行认证以提高安全性。
cgi模块中有一个FieldStorage类可用于表单处理。
有一个HTML表单如下:
1 | <html><body> |
form1.py内容为:
#!/usr/bin/env python
import cgi
form = cgi.FieldStorage() # instantiate only once!
name = form.getfirst('name', 'empty')

# Avoid script injection escaping the user input
name = cgi.escape(name)

print """\
Content-Type: text/html\n
<html><body>
<p>The submitted name was "%s"</p>
</body></html>
""" % name
getfirst方法获取指定字段的第一个值,如果该字段不存在则为空。将表单的方法改为post它同样适用。
为了避免用户提交危险的内容,可以使用cgi.escape()方法对内容进行转换。
对于多个字段具有相同名字的可以使用getlist()方法,它返回一个列表包含了这些值。
<html><body>
<form method="post" action="/cgi-bin/form2.py">
Red<input type="checkbox" name="color" value="red">
Green<input type="checkbox" name="color" value="green">
<input type="submit" value="Submit">
</form>
</body></html>
form2.py内容如下:
#!/usr/bin/env python
import cgi
form = cgi.FieldStorage()

# getlist() returns a list containing the
# values of the fields with the given name
colors = form.getlist('color')

print "Content-Type: text/html\n"
print '<html><body>'
print 'The colors list:', colors
for color in colors:
   print '<p>', cgi.escape(color), '</p>'
print '</body></html>'
<html><body>
<form enctype="multipart/form-data" action="/cgi-bin/form3.py" method="post">
<p>File: <input type="file" name="file"></p>
<p><input type="submit" value="Upload"></p>
</form>
</body></html>
getfirst()和getlist()都只能获取文件的内容。想获取文件名需要使用FieldStorage。
form3.py内容如下:
#!/usr/bin/env python
import cgi, os
import cgitb; cgitb.enable()

try: # Windows needs stdio set for binary mode.
    import msvcrt
    msvcrt.setmode (0, os.O_BINARY) # stdin  = 0
    msvcrt.setmode (1, os.O_BINARY) # stdout = 1
except ImportError:
    pass

form = cgi.FieldStorage()

# A nested FieldStorage instance holds the file
fileitem = form['file']

# Test if the file was uploaded
if fileitem.filename:

   # strip leading path from file name to avoid directory traversal attacks
   fn = os.path.basename(fileitem.filename)
   open('files/' + fn, 'wb').write(fileitem.file.read())
   message = 'The file "' + fn + '" was uploaded successfully'

else:
   message = 'No file was uploaded'

print """\
Content-Type: text/html\n
<html><body>
<p>%s</p>
</body></html>
""" % (message,)
在处理大文件时如果内存不足,可以使用生成器将文件分成小片。
可将之前的脚本改写如下:
#!/usr/bin/env python
import cgi, os
import cgitb; cgitb.enable()

try: # Windows needs stdio set for binary mode.
    import msvcrt
    msvcrt.setmode (0, os.O_BINARY) # stdin  = 0
    msvcrt.setmode (1, os.O_BINARY) # stdout = 1
except ImportError:
    pass

form = cgi.FieldStorage()

# Generator to buffer file chunks
def fbuffer(f, chunk_size=10000):
   while True:
      chunk = f.read(chunk_size)
      if not chunk: break
      yield chunk

# A nested FieldStorage instance holds the file
fileitem = form['file']

# Test if the file was uploaded
if fileitem.filename:

   # strip leading path from file name to avoid directory traversal attacks
   fn = os.path.basename(fileitem.filename)
   f = open('files/' + fn, 'wb', 10000)

   # Read the file in chunks
   for chunk in fbuffer(fileitem.file):
      f.write(chunk)
   f.close()
   message = 'The file "' + fn + '" was uploaded successfully'

else:
   message = 'No file was uploaded'

print """\
Content-Type: text/html\n
<html><body>
<p>%s</p>
</body></html>
""" % (message,)
有时数据头出错是很难定位的,除非有权限访问服务器日志。
好在Python有cgitb模块,可以将异常的堆栈信息放在正文中,作为HTML输出。
以下是一个简单的例子:
1 | #!/usr/bin/env python |
也可以使用handler()方法进行捕获异常处理。
1 | #!/usr/bin/env python |
还有一种更直接的方法,将数据头设为”text/plain”并把标准错误输出设置到标准输出。
1 | print "Content-Type: text/plain" |
注意:这些只是用于在开发阶段,在生产环境中要把它禁用。以免异常信息被攻击者利用。
CGI(Common Gateway Interface),通用网关接口的简称。它是客户端和服务器程序进行数据传输的一种标准。
一个CGI程序可以使用任何语言编写,通常它是放在Web服务器(如Apache)目录下的cgi-bin目录里。
接下来看一个简单的例子。
1 | #!/usr/bin/env python |
脚本程序的第一行指定了python解释器的路径。在你系统中它也可能为:
1 | #!/usr/bin/python |
1 | print "Content-Type: text/html" |
脚本必须输出一个HTTP的头,它由一条或者多条消息构成,然后再一个空行。空行是必需的,它意味着头的结束。
这里我们想要把输出作为HTML解释,因此指定Content-Type为 text/html。
这里也可以写成:
1 | print "Content-Type: text/html\n" |
保存以上脚本,并添加执行权限。然后在浏览器中访问执行该脚本,应该可以看到”Hello World”这几个字。
在这部分的Ruby GTK编程教程中我们将创建一个贪吃蛇游戏。
贪吃蛇是一个比较老的经典电子游戏。它第一次创建是在70年代后期。之后被移植到PC上。在这个游戏中玩家控制蛇,目标是尽可能多的吃掉苹果。蛇每吃掉一个苹果,身体就会变长。必须避免蛇撞到墙或者自己的身体。
蛇的每块关节的大小为10像素。使用方向键控制蛇。初始,蛇有三块关节。游戏立即开始。当游戏结束后在窗口中央显示”Game Over”。
board.rb
WIDTH = 300
HEIGHT = 270
DOT_SIZE = 10
ALL_DOTS = WIDTH  HEIGHT / (DOT_SIZE  DOT_SIZE)
RAND_POS = 26

$x = [0]  ALL_DOTS
$y = [0]  ALL_DOTS

class Board < Gtk::DrawingArea

    def initialize
        super

        modify_bg Gtk::STATE_NORMAL, Gdk::Color.new(0, 0, 0)

        signal_connect “expose-event” do
            on_expose
        end

        init_game
    end

    def on_timer

        if @inGame
            check_apple
            check_collision
            move
            queue_draw
            return true
        else
            return false
        end
    end

    def init_game

        @left = false
        @right = true
        @up = false
        @down = false
        @inGame = true
        @dots = 3

        for i in (0..@dots)
            $x[i] = 50 - i  10
            $y[i] = 50
        end

        begin
            @dot = Cairo::ImageSurface.from_png “dot.png”
            @head = Cairo::ImageSurface.from_png “head.png”
            @apple = Cairo::ImageSurface.from_png “apple.png”
        rescue Exception => e
            puts “cannot load images”
            exit
        end

        locate_apple
        GLib::Timeout.add(100) { on_timer }

     end


    def on_expose

        cr = window.create_cairo_context

        if @inGame
            draw_objects cr
        else
            game_over cr
        end
    end

    def draw_objects cr

        cr.set_source_rgb 0, 0, 0
        cr.paint

        cr.set_source @apple, @apple_x, @apple_y
        cr.paint

        for z in (0..@dots)
            if z == 0
                cr.set_source @head, $x[z], $y[z]
                cr.paint
            else
                cr.set_source @dot, $x[z], $y[z]
                cr.paint
            end
        end
    end

    def game_over cr

        w = allocation.width / 2
        h = allocation.height / 2

        cr.set_font_size 15
        te = cr.text_extents “Game Over”

        cr.set_source_rgb 65535, 65535, 65535

        cr.move_to w - te.width/2, h
        cr.show_text “Game Over”

    end


    def check_apple

        if $x[0] == @apple_x and $y[0] == @apple_y
            @dots = @dots + 1
            locate_apple
        end
    end

    def move

        z = @dots

        while z > 0
            $x[z] = $x[(z - 1)]
            $y[z] = $y[(z - 1)]
            z = z - 1
        end

        if @left
            $x[0] -= DOT_SIZE
        end

        if @right
            $x[0] += DOT_SIZE
        end

        if @up
            $y[0] -= DOT_SIZE
        end

        if @down
            $y[0] += DOT_SIZE
        end

     end

    def check_collision

        z = @dots

        while z > 0
            if z > 4 and $x[0] == $x[z] and $y[0] == $y[z]
                @inGame = false
            end
            z = z - 1
        end

        if $y[0] > HEIGHT - DOT_SIZE
            @inGame = false
        end

        if $y[0] < 0
            @inGame = false
        end

        if $x[0] > WIDTH - DOT_SIZE
            @inGame = false
        end

        if $x[0] < 0
            @inGame = false
        end

    end

    def locate_apple

        r = rand(RAND_POS)
        @apple_x = r  DOT_SIZE
        r = rand(RAND_POS)
        @apple_y = r  DOT_SIZE
    end

    def on_key_down event

        key = event.keyval

        if key == Gdk::Keyval::GDK_Left and not @right
            @left = true
            @up = false
            @down = false
        end

        if key == Gdk::Keyval::GDK_Right and not @left
            @right = true
            @up = false
            @down = false
        end

        if key == Gdk::Keyval::GDK_Up and not @down
            @up = true
            @right = false
            @left = false
        end

        if key == Gdk::Keyval::GDK_Down and not @up
            @down = true
            @right = false
            @left = false
        end
    end
end
首先我们定义一些全局变量。
WIDTH和HEIGHT常量决定了甲板的大小。DOT_SIZE是苹果和蛇的每个点的大小。ALL_DOTS常量定义了甲板可能包含的最大的点数量。RAND_POS常量用于计算苹果的随机位置。DELAY常量决定游戏速度。
$x = [0]  ALL_DOTS
$y = [0]  ALL_DOTS
这两个数组存储了蛇所有关节的x、y坐标。
init_game方法初始化变量、加载图片和启动timeout函数。
if @inGame
    draw_objects cr
else
    game_over cr
end
在on_expose_method方法里我们检查@inGame变量。如果为true,绘制苹果和蛇。否则显示”Game over”文字。
def draw_objects cr

    cr.set_source_rgb 0, 0, 0
    cr.paint

    cr.set_source @apple, @apple_x, @apple_y
    cr.paint

    for z in (0..@dots)
        if z == 0
            cr.set_source @head, $x[z], $y[z]
            cr.paint
        else
            cr.set_source @dot, $x[z], $y[z]
            cr.paint
        end
    end
end
draw_objects方法绘制苹果和蛇。蛇的头部用红色的圆表示。
def check_apple

    if $x[0] == @apple_x and $y[0] == @apple_y
        @dots = @dots + 1
        locate_apple
    end
end
check_apple方法查检蛇是否碰到苹果,如果是则增加蛇的关节并调用locate_apple方法随机放置一个新的苹果。
move方法是游戏的关键算法。为了理解它,先看一下蛇是如何移动的。控制蛇头,可以使用方向键改变它的方向。其余的关节朝该方向前进。第二个关节移到到第一关节的位置,第三个关节到第二个等等。
while z > 0
    $x[z] = $x[(z - 1)]
    $y[z] = $y[(z - 1)]
    z = z - 1
end
这些代码将关节按照链状前进。
if @left
    $x[0] -= DOT_SIZE
end
头部向左移动。
check_collision方法中,我们检查蛇是否撞到了自己或者墙。
while z > 0
    if z > 4 and $x[0] == $x[z] and $y[0] == $y[z]
        @inGame = false
    end
    z = z - 1
end
如果蛇撞到了自己,游戏结束。
if $y[0] > HEIGHT - DOT_SIZE
    @inGame = false
end
如果蛇撞到底部,游戏结束。
localte_apple方法在甲板上随机定位一个苹果。
r = rand(RAND_POS)
获取0到RAND_POS-1的一个随机数。
@apple_x = r  DOT_SIZE
…
@apple_y = r * DOT_SIZE
这几行设置了苹果的x、y坐标。
if @inGame
    check_apple
    check_collision
    move
    queue_draw
    return true
else
    return false
end
第140ms调用一次on_timer方法。如果游戏运行则调用三个组成游戏逻辑的方法。否则返回false,停止定时事件。
在Board类的on_key_down方法中我们判断按下的键。
if key == Gdk::Keyval::GDK_Left and not @right
    @left = true
    @up = false
    @down = false
end
如果我们按的是左方向键,我们设置left变量为true。这个变量用于move方法改变蛇的坐标。同样注意,当蛇是朝右时,我们不能立即朝左。
nibbles.rb
#!/usr/bin/ruby

# ZetCode Ruby GTK tutorial
#
# This is a simple nibbles game
# clone
#
# author: jan bodnar
# website: www.zetcode.com
# last modified: June 2009

require ‘gtk2’
require ‘board’

class RubyApp > Gtk::Window
    def initialize
        super

        set_title “Nibbles”
        signal_connect “destroy” do
            Gtk.main_quit
        end

        @board = Board.new
        signal_connect “key-press-event” do |w, e|
            on_key_down(w, e)
        end

        add @board

        set_default_size 300, 270
        set_window_position Gtk::Window::POS_CENTER
        show_all
    end

    def on_key_down widget, event

        key = event.keyval
        @board.on_key_down event
    end
end

Gtk.init
    window = RubyApp.new
Gtk.main
在这个类我们启动了贪吃游戏。
def on_key_down widget, event

    key = event.keyval
    @board.on_key_down event
end
在这个类的捕获按键事件然后委托Board类的on_key_down method方法进行处理。
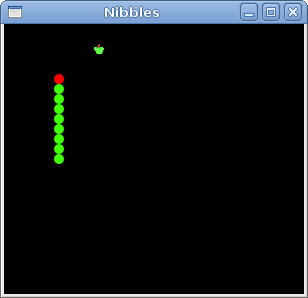
图片:贪吃蛇
这是使用Ruby语言和GTK库编写的贪吃蛇计算机游戏。
原文地址: http://zetcode.com/gui/rubygtk/nibbles/
翻译:龙昌 admin@longchangjin.cn